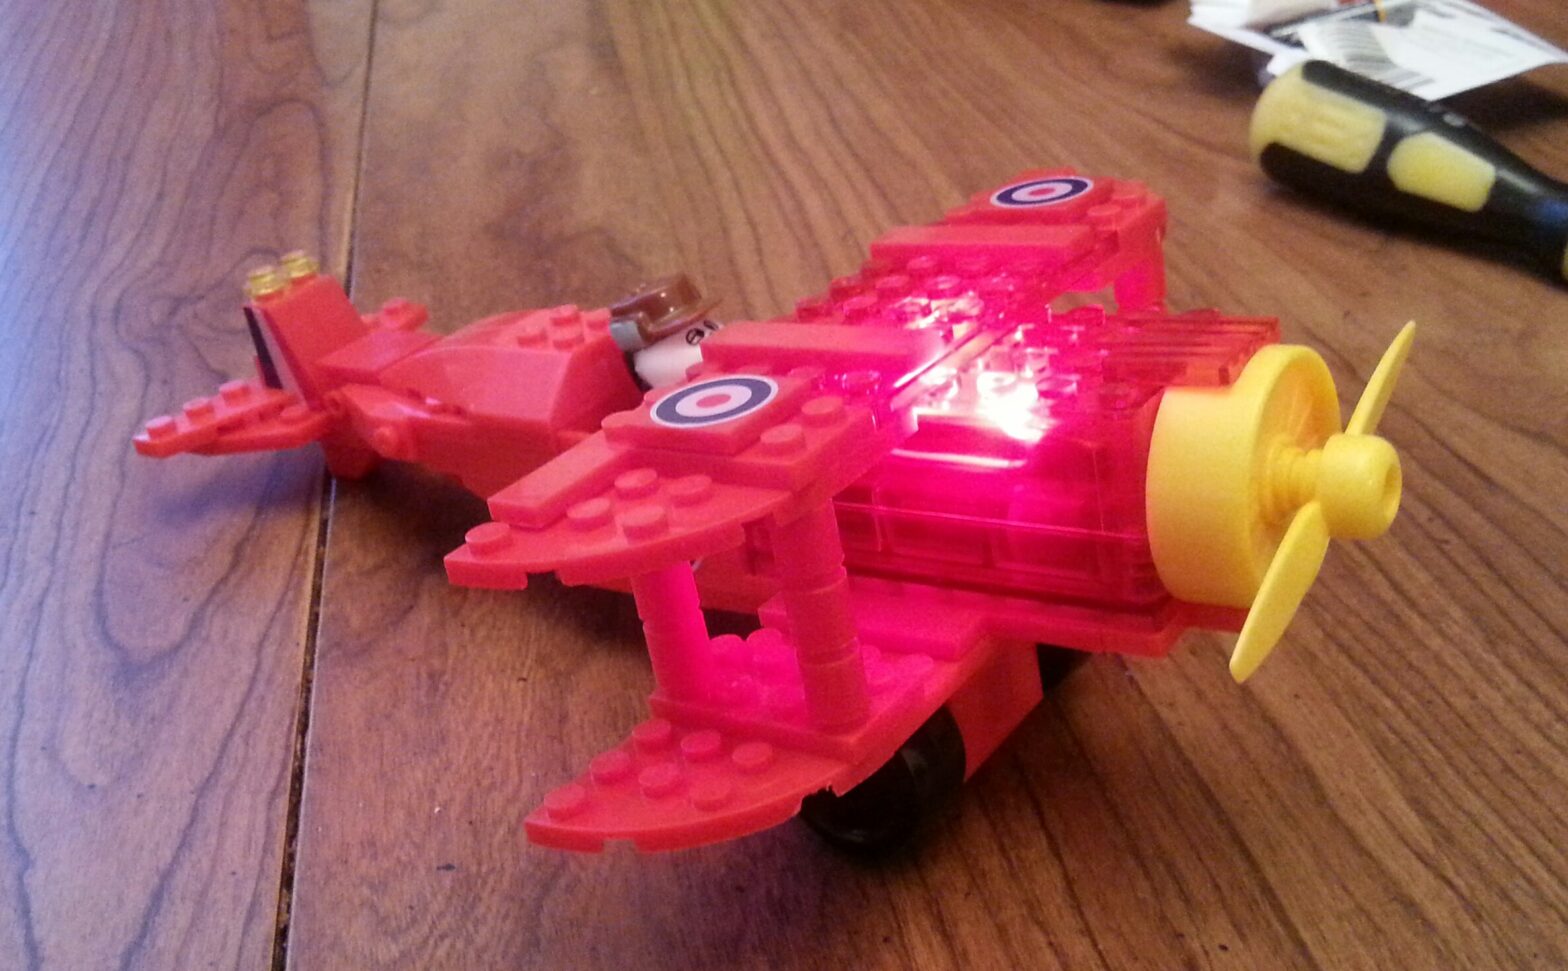
Yesterday evening, after attending the Maryland Renaissance Festival, I found something I knew immediately I had to have — The Peanuts Movie: Olaf’s Biplane construction set from Lite Brix.
Lite Brix is a LEGO-compatible building block made by Cra-Z-Art, a New Jersey company. To tie in with The Peanuts Movie, they produced a number of products, including several LEGO-compatible construction sets. I don’t know what kind of distribution they had, as I never saw them in stores, an all too common state of affairs with off-brand LEGO.
I chanced across Olaf’s Biplane (as well as Lemonade Stand) at a clearance store. I liked The Peanuts Movie a lot, and I wanted to see what the sets were like. Maybe I need to check out other clearance stores to see if I can get the whole line-up, especially since BanBao, another manufacturer of off-brand LEGO, is releasing their own Peanuts off-brand LEGO construction sets next year.

The box is eye-catching. Olaf’s Biplane is a 90-piece set — 77 bricks, 1 LED battery pack brick, 9 “special shaped parts,” and a 3-piece Olaf minifigure. The set requires 3 AAA batteries, hence the pack of batteries and the Philips-head screwdriver.

The bricks came in three bags. A fourth bag was the instruction sheet and a sticker sheet.

The Lite Brix bricks look very much like LEGO out of the bag. The stud tops are flat, and there’s an occasional hollowed-out stud like KRE-O. The bottoms look indistinguishable from LEGO to me.
The shade of red looks slightly off from the LEGO standard red.

The instruction sheet is pretty basic. My one complaint is that it probably could have been printed at a larger size.

This is the base of the biplane and the lower wing. The bricks felt slightly off from the LEGO norm — they’re a little more slick, like KRE-O — but they snapped together quite easily. In a blind taste test… err, blind build test, most people wouldn’t be able to tell the difference.

I attached the tail section of the plane to the base. The tail isn’t firmly attached to the body of the plane. Some of the instructions here weren’t entirely clear; the instructions mark which stud the new additions attach to, and they didn’t always make sense.

I took the LED brick apart, inserted the three batteries, and tightened the screw back into place. It has some interesting light effects.
One thing that the instructions are unclear about is how this brick should be oriented. Make sure you put the switch for the brick in Olaf’s cockpit, toward the tail. Otherwise, if you install the brick the other way, the propeller mount will go against the switch and you won’t be able to use the light feature.
I’ll discuss the light feature further.

It didn’t take very long at all to get the plane assembled, just fifteen minutes, give or take. The propeller mount was an interesting piece to install. It wasn’t hard, merely a little tricky.

Compared to LEGO Gandalf, Olaf is small, a little more than half Gandalf’s size.

Putting Olaf in the plane broke the plane apart!
The plane is fragile, and the tail is barely attached to the body. The best thing to do is to take the tail of the plane off and attach Olaf to the brick that is his seat. Then you’ll be able to use Olaf as a lever to remove that brick so you can turn the plane’s lights on. Then reassemble the plane. Voila!

Here’s Olaf seated in the finished plane. I had started adding the RAF stickers to the wings and the fuselage.

The easiest way to affix the stickers to the tail is to take the tail off the plane and remove the necessary pieces to allow access to the whole piece.

Once finished, it doesn’t look bad at all. It feels quite hefty in the hand, though part of that is due to the weight of the batteries. With the lights running, it looks pretty cool. But it is a fragile set; play roughly with it, and the tail will break off.
With additional LEGO pieces at hand, I saw two obvious changes to make. First, use Olaf’s seat to raise the tail fin, then replace Olaf’s seat with 2 2×2 bricks stacked, so Olaf can see over the biplane’s top wing as he does on the box packaging.

Next, extend the wings with additional 4×4 flat pieces and flip the ends so that instead of curving at the front, they would curve to the back; to my historian’s eyes, as World War I biplanes go, Olaf’s biplane’s wings are far too short for it to ever take flight. I also braced the underside of each with with flat 2x8s, one on each side of the fuselage, top and bottom. The reds don’t quite match between the Lite Brix and the LEGO, but they’re close enough.

All in all, Olaf’s Biplane is a nice little set. The box recommends the set for ages 5 and up, and I think the set poses some challenges, especially with its fragility, that 8 and up, as well as previous LEGO building experience, might be a more realistic age. While there’s not official LEGO Peanuts, Olaf’s Biplane will do nicely as a substitute if you find it, and where I bought it the set was very inexpensive (a mere four dollars) so it’s neither a waste of money nor time.
